Saturday, 29 March 2014

Friday, 28 March 2014
Final Website

To build our website we used the website WIX. "Wix.com is a cloud-based web development platform that allows users to create professional HTML5 websites and mobile sites, through the use of their online drag and drop tools."
The sight allowed us to create a unique and user friendly website for our audience which fitted with our band image and also allows us to promote the video and the band itself.


 Our website consist of many different parts. The home page as you can see consists of different photos, however the first image is one of the two people who make up the band. The viewer has the option to scroll along using the arose to change the image. The pictures on the website consist of images that I took on the day of the shoot as when as a photo-shoot I did of the two band members post shoot. The photographs that I collected on the day of the shoot made up the behind the scenes section of the website, this allows the viewer to see how we achieved the footage of your video and the sorts of things we got the actor to do. This allows the audience to gain a bigger insight to the production of the video. We also made sure that the colouring of the website fitted the look of the video. We did this by using a tidy and clinical web layout and using grey colours to go with the de-saturated and bleak look of the video. We wanted to make sure that were was a running theme through the bands image, video, website and digi pack.

Overall I am pleased with the final result of the website. I feel as though we have created a user friendly website which successfully appeals to our audience and conforms with the band image.
Link to the sight:
Thursday, 27 March 2014
Final digipak - Front cover, inside panels and back cover

The front cover image is an image with is connected with the video itself. We decided to use this as the front cover even tho it is not a single album because we felt as tho its a strong image. I used the app fragment by pixete LLC on the IPAD to produce the design of the image. I also used the same format for the back-cover The back cover image was one I took when doing the ink experiments before our shoot. The image consists of a range of coloured inks being dripped into water. Using the app I selected the design I wanted and formatted the image to fit this. However, on the front cover I decided that the most effective way to display the image would be to have the picture itself in focus and the parts of the image in the lines blurred out. While on the back cover I felt the most visually compelling way to present the image would be to have the main area out of focus and the parts of the image in the lines in focus. This also meant that we could have the other songs in the album written in-between the fragmented square lines.
The inside left panel consists of images that I took in the studio which also went up on the website. I chose to put these images in black and white and in photoshop using the blending tools place the allusion of ink dripped down the background to link with the back cover as well as the video itself. This made all the the panels link better.
The inside left and the CD design I felt it would be appropriate to bring in some sort of connection with the water as there has been some sort of reference with the water in each of the other panels. So therefor, I placed a water image on for the CD and using the front which I have used throughout I smudged in photoshop to give the effect that the water is making the ink run.
Through the making of the digipak I completed many different drafts using various images and designs to see what was the most effective. Through stages of development and refining I came up with the final design.
Monday, 24 February 2014
TASK 4 SCRIPT: How did you use media technologies in the construction and research, planning and evaluation stages?
How did you use media technologies in the construction
and research, planning and evaluation stages?
Research:
Research:
After
creating a storyboard on paper we filmed it with the SONY NX5 in order to
create a digital animatic that we edited and cut together on the soft wear
final cut pro in time to our music. The purpose of this was to see how the
length of the shots worked with the music and see if there were many vital
changes we needed to make, in order to improve the story line before the day of
the shoot. We stuck to this animatic as it was vital on the shoot.
We also had
to cut the length of our track as the music was too long for the length of the
video; we used the software ‘Sound Forge’ for this.
The
photographs were essential to the concept of our video and were taken on the
groups IPhones as well as on an SLR camera. We then got these double printed,
so we had 400 photographs to fill the room.
Production:
We filmed
most of our footage on the FS100, but our video also contained a lot of slow
motion footage, which was filmed on the NX5. When filming the performance
element we had to use the Ipad to play the music out loud which would help
later for the lip sync in post-production, and we also had to use the digital
clapper so when we played it back we knew where we had to start editing from. We
also took photos on the shoot day using a Cannon 5D, as we wanted to record
what we had done on the shoot day as well as take photos for our website.
Some of
this footage was shot on a crane from above as we wanted to use a birds eye
view shot so you could see the whole set, this was taken on the Sony FS100 and
in the bathroom most it was most filmed using the NX5 due to the slow motions. While
filming this there was a TV screen next to us so that we could make sure we
liked what we were filming as we went along.
Post Production:
We also learnt how to use lip sync which we had done an
activity on earlier on in the year. We placed the narrative of the video down
first as we felt that this was the most important element of our video as it
was the most visually compelling. After we created a first rough cut we
evaluated what areas we needed to improve or completely change to make it the
best we possibly could.
We used the soft wear ‘After effects’. We used this software
to create visual effects in order to bring together three separate plates and
using the dissolve tool we created the illusion that the main girl was
dissolving into the bath. This appeared at the very end of the music video.
We also used the program ‘colour’ to adapt the finishing,
colouring and grading. We de-saturated the colours to create a blue tinted
finish, this created a morbid effect.
(We used a range of techniques such as; channel layers,
blading, marking, synching, different rushes and bins, slow motion shots,
changing the saturation and filters in order to create a successful and
creative product.)
Sunday, 23 February 2014
Thursday, 6 February 2014
TASK 2: How Effective is the combination of your main product and ancillary texts?
Richard Dyer came up with the idea that all artists have a certain star image which is usually seen through their videos, website and digi-pack. A star image helps them appeal to a certain audience whether this be a mainstream or niche one, the ways in which this is achieved is they way they not only present themselves but the way they show and sell their media products. Having a star image means that the artists can have a stronger connection to their audience as maybe consumers feel they can relate to them as they dress the same or are into a similar style as the artists. Dyer also mentions that artists are usually influenced by their record company to present themselves in certain ways in order to make sure that they do target a specific audience in a more successful way. Also if we look into the work of Negus who talked about organic and synthetic artists, we can see how artists may reveal themselves in certain ways in order to be liked by different audiences and that if they choose to be synthetic then they are going to have a more mainstream audience where as if they decided to be organic then they would expect to have a more niche audience. Both these theories can help when looking into the star image or our own band, Reverie.
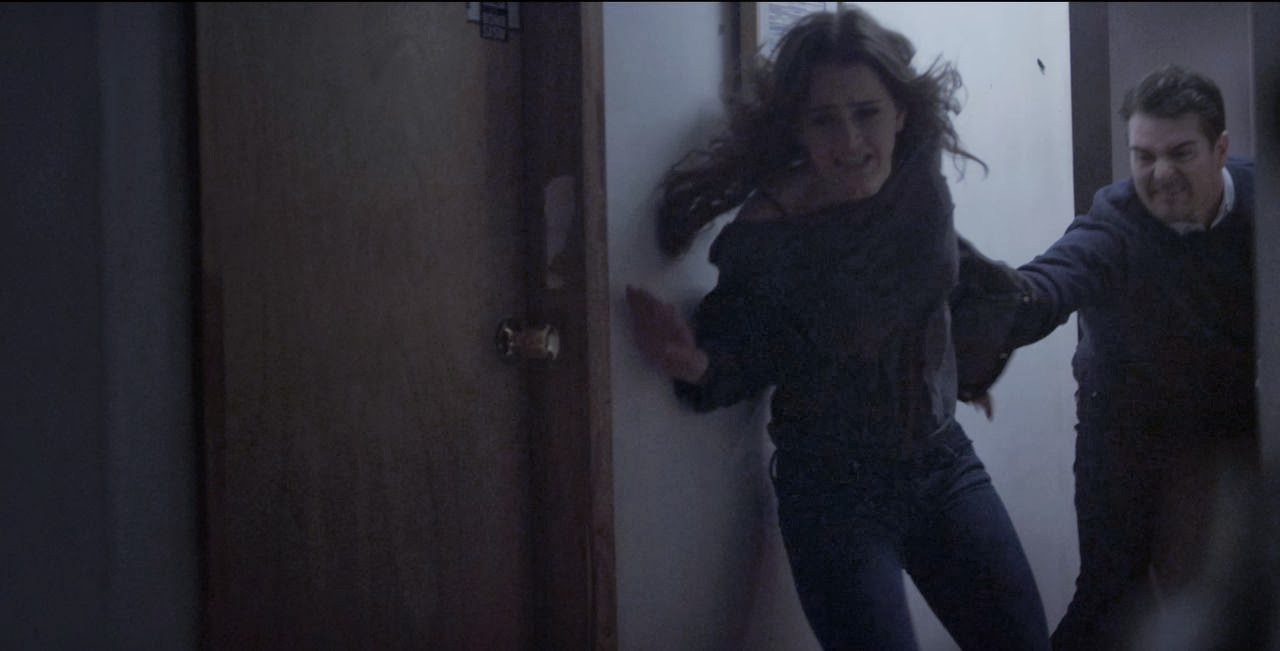
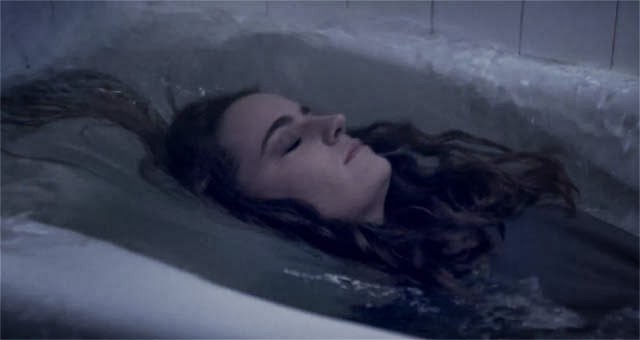 We knew that the star image of our band would be indie and also quite grungy and therefore we kept this in mind when creating our music video. We knew that we would be creating a product that would be of interest to more of a niche audience and therefore we decided to keep the overall look quite de-saturated which made it come across dark and grungy. When looking at the artist Birdy we saw how she used very de-saturated and cold colours therefore we decided to do this with ours as it portrays the star image of the band to be more indie and organic. In addition to this we wanted a very abstract video meaning that the narrative was kept simple yet ambiguous with there being a strong focus on water and inks, which helped with the indie genre that we were in hope of creating and also made it look cinematic. In relation to Negus’ theory we would say that our band is very organic this is clearly seen by there being more of a focus on the narrative rather than the performance element, highlighting their want to sell their music rather then themselves, plus even when the band is shown on screen they are hidden by the multi-coloured inks which adds to this idea. When looking at the music video Breeze Blocks by Alt-J we saw that their video was very focused on the narrative and actually throughout they didn't show themselves and therefore we too though that it would be a good idea to decrease the amount of times the band were present in the video. Furthermore their clothing is very dark and low key not only presenting their style as grungy but also meaning that they are shown to be to be very chilled out people. Also by the fact that they are shown on a much whiter and lighter background in comparison to the narrative they are therefore presented in a positive way and whats more highlights that even though they could be seen to have a slightly moody attitude that they are in fact a band that is approachable.
 For the website, we wanted to make it very simplistic to keep in theme with the video. Therefore the choice of the colour scheme was different shades of grey which meant that it was a very neutral looking format and helped portray their indie/grunge style. Biffy Clyro - who is also an indie artist uses a simple grey colour scheme on their website and therefore we got inspiration from this and also the band Bastille have a very simplistic format and dark colour scheme so we also used this to help us when designing our website. What's more the ‘behind the scenes’ page meant that the band is presented as very open and willing to share everything that goes on to their audience and this then creates a community online as everyone can keep up to date with where the band is and what they are up to. The images of the band present them as close and also as they are smiling this helps them show viewers of their easy going and care free attitude. The images on the home page aren’t all of just the band and include ones of the shoot day of the music video, which again suggests the band wants to focus on what they make rather then themselves, clarifying them as organic artists.
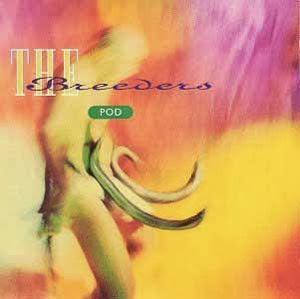 The digi-pack again keeps in theme with the music video and website, this is because there is a clear abstract and indie theme which is kept throughout, in addition the font is the same as the one used on the website. However after looking at 4AD - which is where the original artists of our chosen track are from - we saw that this record company is famous for their album artwork and particularly Vaughn Oliver’s album and when looking at this we saw that there was the inclusion of colour and this actually made the album look more interesting. Therefore as a product to sell we though that we would do the same with our digi-pack and so we included the image of the different inks being dropped into water as our back cover and also in photoshop we made it look as though there were multi-coloured inks being dropped down over the artists - this also made a strong link to our music video. As for the front cover we wanted to keep in very simple and therefore it was an image of a girl in a bath, which again linked in with the music video nicely and the fact that it was very de-saturated made it appear very grey in colour which kept in the theme of the star image of the band.
The overall look that was achieved through the music video, website and digi-pack was kept constant throughout all three products which helped us achieve a stronger star image and therefore a much more clear target audience.
Wednesday, 5 February 2014


Friday, 31 January 2014
Final Cut Evaluation
After watching through our rough cut there were some changes that we needed to make, one was that there were a lot of continuity errors which meant that it was maybe slightly awkward to watch. For example Isa gets out of the bed but then we saw her back in it again, also water is flooding into the bedroom onto the pictures in shots that came before we saw that there was a bath or before the bath is seen to have over flowed so this didn't make too much sense. Therefore we fixed this by moving shots around so showing a shot of the taps being on and the bath over flowing before we saw any water in the bedroom. We also found that the whole sequence happened very quickly meaning that maybe she gets into the bath way before she actually should as we were left with a lot of room at the end that we didn't know what to do with and also that we hadn't included really effective and cinematic shots in the bedroom that we could have put it. So we made the start more spaced out and made it so that she isn't seen going into the bath until later on in the video, this worked much better as it meant that after this shot we didn't have too much footage we could put in as she goes under water and this is how it finishes so once she was submerged we had to finish it quite quickly.
We also found that the lip syncing wasn't also on point which needed to ne changed it is just made the whole music video look a lot more unprofessional as it became obvious that these the two artists were not actually a band and that she was just singing and he was just playing over a track. This was easily changed by using the time proxy to help us get the shots in time with the track.
 The big change though was doing the special effect at the end of Isa dissolving into multi-coloured inks in the bath, the way we did it is on the shoot day we took a birds eye view shot of the girl fully under the water lying in the bath and then we took a birds eye view shot of the bath when it was empty as well, by using these two templates an effect called bubble dissolve was used to slowly move from one shot into the other. But the next step was the ink, on the shoot day we had made ink bombs which exploded in the bath producing this mixture of ink swells in the bath which could be used to know the colours that we wanted to use but for the ink to actually dissolve this girl,what happened was that we turned small parts of her into blocks and dissolved it and then went on the amplify the colours and make it more obvious as to what was happening to her.
Also what we did was use a process called colouring - which is done on an American programme called ‘Coloring’. What it does is change the amount of colours so that they match each other, therefore as we used a lot of white and sometimes the whites wouldn’t match up - maybe because of the time of day had changed or there was a slightly different light set up, etc. - this is when we can use this process so that the colour balance in the image looks correct. Colouring was also used to make it look quite de-saturated and dark in order to keep the style for one quite grungy and also emphasis the dark and troubled message that we are presenting in our music video, we thought de-saturating it would pull off this look after watching the music videos that Birdy had done which use a similar colour process.
Monday, 2 December 2013
Fineshine Ruff Cut
Audience Feedback
The audience which I showed our ruff cut to really loved it. They thought that the footage which we had got was very meaningful and worked very well with the choice of song. They could tell what the narrative was about which meant that the editing was done well due to the fact they could tell the storyline. There is a few weaknesses and they were down to timing in the rough cut. We took footage of some of the same shots when the floor was wet and dry and we got a bit muddled when editing this footage. The audience noticed that we need to change one of the shots from having dry floor to wet floor as the bedroom has flooded at this point. I agree that we need to go back and just keeping checking what shots have been flooded and which ones haven't.What do you think of the footage?
I really like the footage and I think it works well with your song. It's interesting to watch and you don't get bored at all watching the video. The shot which I like the most is the Ariel shot of Isa in the bed.
Can you tell what the narrative is?
Yes, it's a very clear narrative, the only thing which I've noticed is that at one point when the bedroom has flooded, there is a shot where the bedroom goes back to being dry. This doesn't make much sense, so I think this may be a mistake.
Do you think the editing fits well with the song?
Yes, it all flows really well, there is a part where Isa pulls her hand together and the lyrics read 'and pull' which fits particularly well. The band footage works really well with the other parts and has been edited in to work well with the lip sync as it looks like the singer is really singing. There is only one part towards the end of the song where the singer is slightly out of time but it just needs changing very slightly.
Is there anything you think we could improve on?
I think all you need to work on is making sure that the timing on everything works well and make sure that it flows slightly better than it does at the moment. I think the shot where the taps are running doesn't look quite right and maybe should be swapped for another shot. It's not a very interesting shot as well as not looking as clean as the others. Also towards the end its a bit mix and match. It needs to be flow more towards the end and needs something to happen with the last shot.
What's your overall view?
I really like it and I don't think there is much to do. If that was your final piece I would be surprised. The editing has been done really well and the footage is amazing. The storyline makes sense however i do think that there are some cuts in there that need to be changed and adapted in order to make it flow better.
Wednesday, 20 November 2013
Progress of Rough Cut Evaluation


 We started placing the narrative elements down first due to this being the main focal point on our video. We thought that we would put the performance clips in different areas once we had the basis of the narrative down first. After we had got the main bulk of the narrative down we adapted the shots to make sure they were cut to the beat, this would was to ensure that the video flowed well. If they were not cut to the beat it would just feel awkward and would be uncomfortable to watch. It became clear that we needed to be careful about the time length of the clips, making sure that they did not go on for too long or pass too quickly so that it did not get to boring to watch or the audience do not get time to see what the image was.

However, there has been a few problems in the editing process so far. We all felt that the slow motion shots worked really well and when we started to put the normal motion shots they did not work as well. So in in this case we had to slow down the speed of some of the footage to make it more pleasing to watch. This was a problem with the arial shot of Isa getting into the bath. We had to slow the speed down of this shot in order to make it look more effective. On the other hand, we did speed up the shot of the bath filling up so that we were not sitting around for ages waiting for it to overflow. We also ran into a problem where we were making it all happen to fast which meant we had allot of time at the end and she had already gone under the water. Once she is in the tub we cant really go back to the shots at the beginning This made us realise that we needed to make more use of the footage of her in the bed room in oder to stop this from happening. We also need to make more use of the shots with Isa in the bath before she goes under the water.


We have now moved onto working on another cut of the video experimenting with other ways we could piece it all together and the best way for the sequence to reveal itself at the end. We also need to work with how we are going to make Isa dissolve into the bath at the end. We only have one shot of the explosion of the ink in the bath and two of isa sinking into the bath. This was because they were 'one time shot' things. We need to ensure that this looks realistic as possible and does not reuin the whole look of the video.

Thursday, 14 November 2013
Evaluation of Website (frist draft)
We started to create a website to promote and sell the artist image and the video. Before we could start our own website we made sure that we did enough research into other artists blogs that were similar to our band. This meant that we new the sort of look that we were going to go for when it came to us creating our own website.
We were introduced to the website editor WIX which allowed us to use templates adding our own images and text into to template and creating our own website. The first step we took was thinking about the website layout and the sort of look we were going for. We decided as a group that we wanted to have quite a clean and clinical look to the website with quite neutral colours. We went on from here.

 After selecting the template and the designing the general layout we split the web into different sections this being; home, about the band, behind the scenes (consisting of photographs that I collected on the day of the shoot), Tour dates, News, New Music Videos and contact information. Having collected a vast amount of photos on the shoot day we were able to scatter these all over the website. However, when adding the images into the site it became apparent that we did not have enough pictures of the band. Having recognised this we are going to set up a photo-shoot with the band members so that we can place these onto our website.
 For the first draft I just created in photoshop a merge of two photos which I do have for the mean time. However I will shoot this properly. Again we want this to be quite clean, basic and simple.
This is only our first draft but we are pleased with the results for far. Once we have gotten images of the band and the video up on the website it will be much more complete. We were also thinking about placing the time laps we created of our shoot day on the go-pro onto the website; this will show the construction of the shoot day and what went into it.

We were introduced to the website editor WIX which allowed us to use templates adding our own images and text into to template and creating our own website. The first step we took was thinking about the website layout and the sort of look we were going for. We decided as a group that we wanted to have quite a clean and clinical look to the website with quite neutral colours. We went on from here.


 After selecting the template and the designing the general layout we split the web into different sections this being; home, about the band, behind the scenes (consisting of photographs that I collected on the day of the shoot), Tour dates, News, New Music Videos and contact information. Having collected a vast amount of photos on the shoot day we were able to scatter these all over the website. However, when adding the images into the site it became apparent that we did not have enough pictures of the band. Having recognised this we are going to set up a photo-shoot with the band members so that we can place these onto our website.
 For the first draft I just created in photoshop a merge of two photos which I do have for the mean time. However I will shoot this properly. Again we want this to be quite clean, basic and simple.
This is only our first draft but we are pleased with the results for far. Once we have gotten images of the band and the video up on the website it will be much more complete. We were also thinking about placing the time laps we created of our shoot day on the go-pro onto the website; this will show the construction of the shoot day and what went into it.
Wednesday, 13 November 2013
Music Promo - Evaluation of shoot day
 After months of planning very carefully our music video it came time to shoot it. The weeks running up to the shoot day it was essential that we got all the props sorted; each member of the group taking different responsibilities and taking their share of the weight. The photos were a key part of our shoot so the group and I took hundreds of photos of the guy in which she was stalking and sent these of to get printed.
 The day before the actual shoot we began to build the first set up so we could get going as quickly as we could on the day of the shoot. We decided to shoot the bathroom scenes first. We set up the basis of the bathroom set and the bedroom as there was water involved in both of these scenes. We place many sandbags in the shape of the room, piling them up. We then placed a membrane over the sand bags to keep the water in the area. We then placed weights on top of these to ensure that the membrane did not slip and allow the water to escape. We placed down black and white floor pattern to look like bathroom tiles. We wanted this set to look very simple as we did not want to sets to look at all homely or lived in really. We had to think very carefully when it came to putting in the lights. Because we were using water in our shoot and overflowing the back it was essential that we did not use and floor lighting. After some thinking we attracted lights to some fishing line and hung them from over the walls. This meant that they were floating just above floor level and not at risk of touching the water. We also used over head lighting. During the building of the of the set I was not to sure how it was going to look and was slightly worried about the lighting. However, when it was finished we were all very pleased with the set up and felt it was very simple get extremely effective and gave exactly the look in which we wanted - cold and un-homely.


 One the day of the shoot we still had some setting up to do. We envisaged the video to mainly be filmed over head. This meant that we had to sent up the crane. We also needed to fill the bath. However, we needed to make the bath water warm for our main girl and there is no hot running water in the studio. This meant that we had to cart buckets of hot water from the kitchen to the studio to fill the bath with warm water. After there was enough hot water we attached the hose to the taps making the water run through them and waited for the bath to over flow... This was a very tense wait... We had scattered many photos round the floor of the set.
We assigned ourselves different roles, these being;
Kitty - Director
 Olivia - Checking of all the shots and making sure we got all the shots we needed and wanted
Me - Photographer
Beth -
While we all had our individual roles we also all took turns with the camera work and being 'hands on'. In my role I was ensuring that while I was accounting the day of the shoot I was also trying to get some good shots that could potentially be used for our album art work and website.
 Our first set up was generally quite successful and we were all very happy with the shots that we achieved. We removed the water from the bath and took the bath out and removed the flooring. We then placed down some old office carpet for the bed room scene. We warped a single mattress with the membrane so that the water did not sink into the mattress as otherwise it would be extremely heavy after and the room would be hard to flood because the mattress would sink up a huge amount of the water. We then made up the mattress with sheets and made it look 'lived in'. Again with this set up we covered the floor with photographs and began to flood the studio. One problem we had here was that the water was going under the carpet. However we quickly resolved this. Liv made sure that we got all the shots that we wanted. We were very pleased with the shots which we got with this set up to and even got some really effective slow motion shots.

 The third and final set up was for the performance element. This consisted of a white backdrop set up and a piece of Perspex plastic in which we were going to drip ink down. We mixed the ink with glycerine to make it thick so it would run like a gel substance down the plastic. We then collected a range of shots for the performance element. These consisting of close up shots of both individual members of the team taking a range of shots as well as both members together. In the performance element is played hugely with the focus. Moving between focusing on the ink running down the glass and the performance element. Creating a range of interesting depth of fields. I feel this was extremely effective and am pleased with out this came out.
All in all I feel that our set design and that way in which we shot the video communicated the concept really well. While it was ambiguous how it was going to go on the day and the members of the team were unsure how it was going to look it went as well as it possibly could have done. We collected a range of interesting shots and looking back on the footage am very pleased with what we have. The slow motion shots I feel as really effective. The crane was definitely used to our advantage and really gave the look in which we wanted to achieve. As a team we all worked really well together. While we all had our individual roles we all looked after each other and helped each other out.

As a result of me taking photographs throughout the day we now have a collection of photographs that we can imbedded into our website; widening the content of our website.
I think I can safely say on behalf of myself and all the group members that we are really pleased with the footage we collected on the day and are very exited to take the next steps towards our final product.
Tuesday, 5 November 2013
More Ink Experiments
We needed to test out the inks that we had brought to ensure that they worked in the same way and also to test and colours and see how they mixed. I got a fish tank and dripped the ink cartages into the water. Collecting a range of evidence; this being photographs as well as recordings.
I also placed the photographs into the water to see how they would react to the water. The photographs did not rein at all. To create an effect where the ink would run if you drip the ink onto the photograph while it is wet the ink sinks into the image, giving the effect that the ink in the photograph has run.


I also placed the photographs into the water to see how they would react to the water. The photographs did not rein at all. To create an effect where the ink would run if you drip the ink onto the photograph while it is wet the ink sinks into the image, giving the effect that the ink in the photograph has run.


Looking at how the photographs react to water. When you put the ink onto of the wet photograph the ink leaks into the image and makes it look as to the ink from the photograph has run... this could be something we do in the video
Friday, 1 November 2013


Tuesday, 29 October 2013
Ink Experiments
Our music video contains imagery that is made through ink running in water. Experiments needed to be done to make sure that this would work and to see how the ink would fall in the water and what it would look like.
I did the experiments in the sink and it was purely to see how it worked. I ran the water and dripped drawing ink, quink and food colouring into the water.


I did the experiments in the sink and it was purely to see how it worked. I ran the water and dripped drawing ink, quink and food colouring into the water.
Images:


Subscribe to:
Posts (Atom)